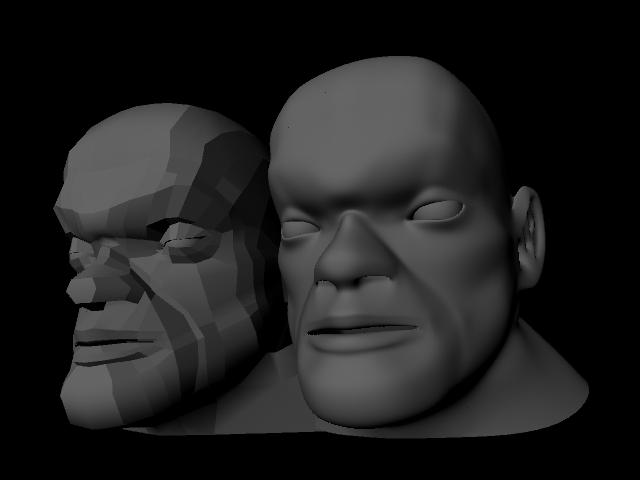
Maya로 얼굴 모델링 연습.
왼쪽이 Polygon, 오른쪽이
SubDiv
Viewport 메뉴중 View-Image
Plane-Import Image로 front view와 side view에 이미지 불러 들이고 View-Image
Plane-Image Plaen Attributes-Placement Extras-Center에서 각각
z축, x축에 따라 위치를 -20씩 뒤로 옮기기.
Polygon Sphere에서 시작,
돌리고 반쪽만 남기고 Edit-Duplicate Special (instance, parent, Scale:
x: -1 선택)로 복사,
Edit Mesh-Split Polygon
Tool로 부분적 면 나누기,
Edit Mesh-Insert Edge Loop Tool로 많은 면 나누기,
Edit Mesh-Extrude로 Edge, Face등을 뽑아내 확장시키기,
Edit Mesh-Append to Polygon Tool로 비어있는 면 채우기,
Snap to Point등을 이용해 두 vertex들의 위치를 일치시킨 뒤 Edit Mesh-Merge로
점 붙이기
등을 이용해 얼굴 제작 하고 얼굴 반쪽을
선택, 지운 뒤 남은 반쪽을 선택하고 Mesh-Mirror Geometry (-X, Merge with
the original, Merge vertices 선택)를 실행, Modify-Convert-Polygons
to Subdiv로 변환.
UV 작업은 Pelting Tools란
Plug-in을 사용.(http://lab.hydralab.com/blog/)
Maya 8.5
|